Sunday, September 4, 2011

Finally, A Manicure With Staying Power!

About two weeks ago, my mother-in-law and I treated ourselves to a manicure and pedicure. Us hard working gals wanted to do something nice for ourselves, so we scheduled our appointment at Galaxy Nails in Woodbridge. This was our second venture there as we were quite pleased with the quality of the service we received the first time, and being all of maybe a mile from home you can't beat the commute!

Before going, I had remarked to my mother-in-law that I would just like to get a pedicure as I cannot keep manicures nice for even 24 hours after leaving the salon. (Once, I hadn't even taken two steps out the door before I had horribly smudged a nail, causing me to have to sheepishly return to ask for a touch up). Nevertheless, she insisted.

Upon arriving, she saw a sign for Color Gel Nail Polish aligned with the phrases, "Tired of having your nails chip? Tired of waiting for them to dry? Try our no chip, no dry Color Gel Nail Polish!" So, she asked the owner of the shop what it was exactly and how valid were these claims. The owner assured us that it would not chip and last 2 weeks. We figured, why not give it a go. If it works, we will be able to enjoy our "treat" that much longer! Skeptical but willing to try, I picked out my color - a vibrant red/orange.

The process is a little more involved than a regular manicure but less obtrusive to your actual nails as the color gel just sits atop your natural nail - no dremmel-like tool needed to shave down your ridges and cuticles as in an acrylic manicure. Catherine Saint Louis of the New York Times provides the rest of the procedure in a nutshell:
A manicurist paints on a base coat, two color coats and top coat, as she would with regular nail lacquer. But after each coat, the soak-off gel is cured briefly under ultraviolet light, so the client leaves with impeccably dry nails.
Truly, there was very little wait time, and my salonist gave me a nice back rub while we waited the last few minutes for the final setting to occur. Both my mother-in-law and I were quite impressed with the quality of the polish's look; it was quite shiny, smooth, and gave the feel of stronger nails. We left happy and hopeful that this new product just might work for us.

The next day, I was quite impressed that I went through a whole day of work with no chipping or breakage. As was true the next day and the day after that. The true test came on Friday, our big clean and move-all-our-equipment day, and still, my nails looked as full of luster as they did when I got them done. Needless to say, I was impressed. I am very hard on my hands, and I was not getting this polish to budge.

Michelle Mismas, author of alllacqueredup.com, had a similar experience when she "test drove" the color gel polish: “When I was wearing it, I beat my hands up, and I couldn’t get a scratch...I was banging into things on purpose to see if I could trash it.” 2 weeks later, hers were still holding strong.

By the end of week 1, I, however, had lost one. It lifted and came off entirely. However, unlike acrylic nails that require plastic tips to be super glued to your real nail and, when removed, essentially leave them "torn up" and in need of another rotor rooter treament, the color gel caused little to no damage - nothing a little normal filing couldn't smooth out.

In the days that followed, a few more of my nails lifted at the corners, which of course caused me to play with them until they too fell off. But being that the color and look of the polish remained constant throughout and their removal caused far less damage than other experiences I have had, I remain a happy customer. My mother-in-law and I joked that for me to keep them nice for 1 day would be a remarkable accomplishment, and this manicure lasted 1 full week.
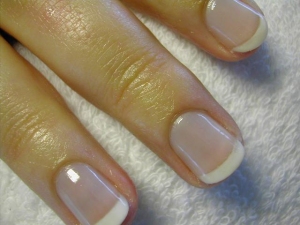
I would certainly get the color gel nail polish again. It is more expensive than a traditional manicure but not much different than acrylic tips - about $45 for the inital treatment, $25 to "fill," but it is worth to me it if it actually lasts. You can find more costly ones, but that generally means they are using the more high end gels. Also, a good idea to combat the growth that occurs after two weeks is to do a french manicure look with a colored tip but a more natural tone towards the cuticle.

I think for my next nail venture, I will investigate Sally Hansen's Salon Effects stick on manicure. At $8.54 + no additional tip at Target, it is worth a try in between salon visits. Plus, they have such neat colors and patterns. Looks like fun! But, I highly recommend the color gel treatment. It really does have staying power.

Sunday, August 21, 2011

A Brief History of the Argyle Print


Argyle has come a long way since first seen on someone's socks. This thought crossed my mind as I stared at my lovely green & pink steel water bottle. What began as a sock trend has now encompassed nearly every clothing and accessory item as well as stationary, lunchboxes, phone cases, water bottles, and much, much more!


So where did it come from? Well, funny you should ask. :)


Fashion legend has it that the argyle print originated in Argyll, Scotland, worn by the high clansmen of the family Campbell, and dates back as early as the 17th century. It appeared as a type of tartan, which refers to the pattern of crisscrossed lines displayed on cloth, i.e. what we Americans refer to as plaid.


They used it on their kilts, plaids, and socks. (For a Scotsman, a plaid is a cloth or blanket slung over the shoulder).


Supposedly, the first argyle sweater was created sometime in the 1920's by Pringle of Scotland, a luxury knitwear manufacturer and importer. However, the print did not become considered high fashion until after World War I. One source claims that it was the president of Brooks Brothers, having returned from a golf tournament held in Scotland, who presented the U.S. with the argyle pattern. Recognizing it's great potential while overseas, he took to producing the first pair of North American argyle socks in 1949. 


And you know the rest of the story. Now, argyle is everywhere! The "look" has become iconic and associated with intellectualism ("preppies"), suiting teenagers and adults alike.

Outside of my water bottle, I do not own any other argyle printed items. "Preppy" was never my thing. Nevertheless, I can appreciate the history, uniqueness, and originality behind a trend. After all, one would be hard pressed to find someone who has no clue what argyle is. For that reason, it pervades as a timeless classic in the fashion world. Kudos to the Scottish!


Sources (the jury is still out as to whether or not they can viewed as reliable):

Sunday, August 7, 2011

Owls Are A Hoot!

So huge in the fashion world right now - Owls!!! And I love 'em. I am so intrigued by their various designs. Because they are a feathered friend, featuring them as jewelry or on clothes automatically lends extra texture and pop to your look.

Apparently, Marc Jacobs is a big fan. I swiped this photo of a collection of his from a fellow blogger:


I think the easiest way to incorporate an owl into your wardrobe is as an accessory. And as far as they go, Forever 21 - a favorite spot of mine to snag cheap, trendy jewelry - carries a host of Owl accoutrements.

I am dying to get my hands on this necklace,
but haven't found it in stores yet. If you do,
grab it for me. I'll pay you back!!!


Charlotte Russe also offers some neat options.


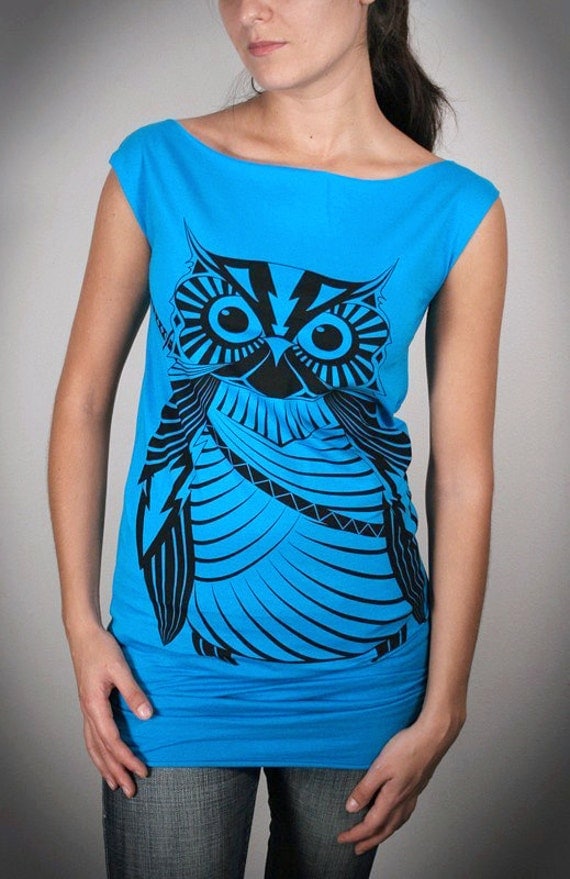
I love this stand-out top by American Apparel (left) and covet this whimsical scarf (right) from ModCloth.


I was curious and looked into as to why this foul may have suddenly wound up in the fashion world, but came up with no real answer. So, I looked into what symbolism lies behind owls in general. They often denote: wisdom, mystery, intelligence, and protection. One could have fun flaunting and/or embellishing on such characteristics. In fact, if you want to up the wisdom/intelligence factor, Forever 21 has this "Nerdy Owl Necklace," featuring Harry Potter like glasses. Not for me, but I could seen a brain-iac going for this piece. :)

Well, I hope you have enjoyed this small overview of owls in fashion. I am actually somewhat surprised at myself for how much I enjoy them. But, the more I allow myself to indulge in things that heretofore may have been unlikely candidates, the more delight I find in my wardrobe.  Hope the same can be said for you!

Saturday, July 16, 2011

Delighted by Devil's Food

So tonight, I had a craving for a nice big piece of chocolate cake. Mmmm.... However, along with this craving comes a few dilemmas:

  • Going to any restaurant, desserts are killer - calorically and certainly when it comes to fat content. The portion is usually equal to what two people should have. There is nothing guilt free about it. For example, the Triple Chocolate Meltdown from Applebee's - a decadent and wonderfully chocolatey dessert option - clocks in nutritionally at: 820 calories, 48 grams of fat (30 which are of the saturated variety), and 9 grams of protein. Eek! That's a no go. (At least for tonight; I have been known to more than happily consume on of these yummy confections single-handedly before).
  • I could make my own cake! Sounds like a good remedy; however, sweets in this house don't generally go quickly. In fact, they tend to not go at all. I am the only real dessert eater. The others in my household go more for salty fare than sweet at the end of the day. Furthermore, while the version I make would hug my waistline less than a restaurant one would, prepared as directed on the back of the box, it is still not my best friend.
    So, I came up with a brilliant idea!!!

    I set out to create enough cake for me to consume over the course of one week. How? I opened the package of Devil's Food Cake mix I had, and after measuring the entire contents to be 3 cups, I spooned out 1.5 cups of it. Now, I only have to make 1 8-inch or 9-inch round cake instead of 2.

    Next, since I slashed the amount of mix in half, I needed to slash my other ingredients in half also. Instead of 1⅓ cups of water, I used ⅔. Instead of 3 eggs.....hmmm...I don't readily have access to only ½ of an egg, so I just used 1 whole egg. And for the oil, I was directed to use ½ cup. But the eggs and the oil is where the fat comes from, so if I could substitute something here I'd feel better. So, I did.

    Instead of oil, I used 1, 2.5 oz. package of pureed banana (i.e. baby food). I should have probably only used 2 oz. but since I was down ½ an egg, I figured this would make up for it. Mixing them altogether, the batter became quite smooth. Into the pan it went and baked for 32 minutes at 325°. Since I don't particularly care for frosting in the first place, I figure once it cools, I'll dust it with powdered sugar, and it'll be a done deal.

    Now for the exciting part:

    The nutritional data on this whole cake is as follows:
    • 291 calories
    • 5 grams of fat
    • 8 grams of protein
    That's on the whole cake. For 1 out of 8 slices, this cake weighs in at 36 calories, .63 grams of fat, and 1 gram of protein!!!!! I could practically eat the whole dang cake with a clear conscience! Prepared the way it is directed, one piece is just about equivalent to the above measurements! Check out this breakdown from myfitnesspal.com:

    10714_small

    1/12 pkg, 260, 2g, 35g, 2g


    Now, the disclaimer is this: as of this moment, I have not tried a piece. This experiement could have gone horribly awry, and this cake could be the worst thing I have ever concocted. So, I will let you know after I try it how it turned out. But this just goes to show you that with a little bit of extra thought and some ingredient substitutions, you can still make tasty treats without damaging your healthy living habits. Go me!!!


    Addendum: After allowing my cake to cool and diving into a piece, I was, in fact, delighted! The cake was super moist and delicious. Sure, it lacked a little decadence due to the lack of fat; however, I do not think that its absence left the cake wanting. On the contrary, it truly pleased my palate.

    I've topped it 2 different ways: 1) with Friendly's Carmelot ice cream. Mmmmmm....; 2) with powdered sugar, drizzled lightly with caramel syrup. Both were great. I am thrilled that this recipe alteration worked out! Give it a try!

    Sunday, June 26, 2011

    A Feather Frenzy

    Dear Readers,

    Forgive me for my blogging absence. Busyness is a primary cause, but more than that I have felt largely uninspired of late. I am having a difficult time with summer's fashions this year. I appreciate the Bohemian vibe and the throwback to the 70's, but few pieces strike me and/or would work on my figure. Both styles make use of billowy tops, dainty fabrics, and outrageous prints. Such accoutrements are not beyond me, but I've combed several stores in the last week as well as searched online and have come up empty handed. Meanwhile, I've made use of pieces I already own, which is probably better in its own right, but as a woman, I am only all to glad to add to my wardrobe. :)

    My mother always keeps an eye out for interesting and controversial goings-on in the fashion industry for me. She came across an article about the newest rage - feather hair extensions. Made intensely popular by Steven Tyler showcasing them on the most recent season of American Idol, fly fishermen and their tackle suppliers are getting highly annoyed with women coming into their shops to buy the "hackles," the especially long tail feathers of a rooster. In an article posted on PETA's website, it is explained, "Roosters used to make these extensions are bred and genetically altered to produce long, luxurious saddle feathers (the ones on their backsides, which can take years to grow) before they are killed [euthanized] and de-feathered for their precious plumage." Needless to say, PETA sides with the fishermen. Recently, these birds have been killed in record numbers to meet the demand of fashionistas, desiring to make a statement.

    My take on this situation:

    I will not be adding feathers to my hair, albeit they do look pretty neat. They are rather expensive and only last a few months - not something I'm willing to put the money out for. (I'd rather get my next tattoo). :)

    I do feel bad for the added number of birds who have died recently in the name of fashion; however, remember, this has been occurring for quite some time for fishing, etc. just not in this great a quantity.

    As with any fad, the craze will eventually die out. Next season it could be peacocks! Actually, this would not altogether shock me. Why not peacocks!? They have beautiful feathers! But these roosters are already getting messed with by being genetically altered, so I will not be signing any PETA petitions.


     Nevertheless, since we live in the land of the outsourced and artificially fabricated, it would be nice if someone devised a way to create artificial feathers that looked great and did not cause a bird to die before its time. Oh look! China did! Furthermore, Amazon.com sells them for less than $10 with shipping. For that amount of money, I just might put them in. I could see my sister and I doing that together for the summer (*hint, hint*).


    Your thoughts??????

    Saturday, June 4, 2011

    The Quest of a Bathing Beauty, Part 2

    So my quest brought me to Fashion Bug - on a whim, not really sure I would actually find anything, but I have found some winners there in the past. I tried on a few suits, finding only one potential possibility.  Behold...

    I thought it looked nice on me. I liked the shirred sides, the shimmering color, and the skirt that served to minimize the girth of my hips and thighs. I tried two sizes - an 8, which fit albeit snugly over my thighs and a 10, which fit more comfortably over my legs without looking overly baggy in other areas due to it being a size larger. However, upon inspecting my back side to see how it measured up, I noticed with the size 10 that the fabric had pulled away from the center back seam. Now, in the past, I have had trouble with seams on items purchased from Fashion Bug, so seeing this occurrence sent up flags of alarm for me. Unable to get past this, and the $40+ price tag, I took a picture of myself in it and resolved to think about it for at least 24 hours.

    I sent the picture I took to my sister - an always trustworthy 2nd opinion. She did not like it. In fact, she hated the skirt. She said it made the suit look like a dress. Her husband said it looked old ladyish, and my husband said it looked like it could pass for lingerie. Needless to say, I did not not return and purchase this suit. With my doubts regarding its manufacturing and such "glowing" reviews from those closest to me, I decided it wasn't meant to be.

    I pressed on.

    Today, I went to JCPenney. I tried on about 5 suits. I found myself getting highly irritated. You see, I fall in the middle. I am not small enough to pull off a bikini well, and I'm not large enough to require slimming add-on's like super spandex or boning. I took 4 pictures to bring before my committee. The results:
    • One made me look almost pregnant - a definite NO! 
    • One, upon review by Jon (husband), seemingly added about 40 lbs. to my figure - a resounding NO! 
    • Changing the color of that style did not do anything for me; in fact, the picture I took of myself in color option #2 has been captioned, "Trailer trash." Eek! 
    • I tried a bikini. The style wasn't bad, but well known to me, yet unbeknownst to my sister until this evening, I have a "funny hip," so exposing that much skin does make me appear a little odd. Indeed, my right hip actually sits higher than my left, throwing off my proportions. I've known this for years. It bewildered my sister.
    I left Penney's discouraged and hating my shape. It seemed as if I would not be able to find anything. Not really an option for someone who hopes to travel to the beach semi-frequently this summer and whose suits from last year are 2 sizes too big. Thank you, Zumba. Nevertheless, woe is me.

    This week, many department stores are having huge sales on all sorts of items. Specifically, swimwear has been discounted anywhere between 40-60%. So, I wanted to cash in while opportunity was knocking. So, later, I went to Kohl's. I perused their website beforehand to get an idea of which suits I wanted to try. I found these:


    I really did not want to get a mostly black suit so bottom-right was my least favorite option, but at least armed with a few visuals I would not be searching blindly upon arriving at the store. I did not come across 3 out of the above 4 suits. Truly, I wasn't aggressively searching for them (except for the pink one; I liked that one a lot). I ended up in the fitting room with 4 suits again and repeated the process.
    • A deep purple one - beautiful color on me, halter style, tankini. Tried on paired with 2 different bottoms. Close, but no. The picture of me in it was captioned, "Battling bulges!!!"
    • One by Nike - the fit was not doing me any favors. It just simply was not me.
    • The one pictured right - I didn't like all that black. I really wanted a print. It didn't look bad; it just was not what I was really looking for.
    •  Top-right in the above table - turned out to be the one. This suit is by ZeroXposur - a brand that I had seen previously in my "research." I instantly fell in love with their overall look - athletic, yet not all brute and no class. I had seen similar suits in Penney's and Sears, but they were never quite what I was looking for (usually mostly black as in the case above). So, I was thrilled with this find. However, I was unable to purchase the displayed bottoms; they did not have them in my size. Instead, I purchased boyshort bottoms by Candie's (see below).

    The best part about it was not only that I looked fabulous in it, but the top and the short cost $37.98 together, which is under the $40 I budgeted for this purchase. But, wait! :) There's more! Because they were on sale, I saved about $25 between the two of them! Major score! Now, I need only the beach!

    I am happy to have closed this chapter in my never ending quest towards fashion greatness. (So is my husband).

    My advice: don't settle. You know what you want; don't put out the money until you are 100% sure of what you are buying. It's not worth it. Furthermore, with everything online, your possibilities are endless; you must be willing to search for them, however. I've also heard that you love an item most in-store, so if you're not head over heels in love with it there, you most likely will not be when you get home. But I wish you all the best in your bathing beauty quests. Make sure you work with your body shape. I know it can be highly frustrating and even a little scary, but it is possible to find a suit that makes you look great and feel awesome while wearing it. Feel free to hit me up with some stories/photos of your journey. But until then, see you at the beach!

    Sunday, May 15, 2011

    Rocco Dispirito's Shrimp Po' Boy with Spicy Mayo


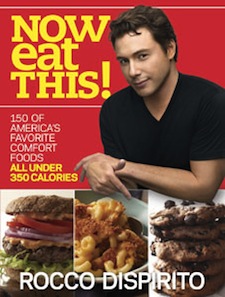
    Taken from Rocco Dispirito's cookbook, Now Eat This, this is his take on a po' boy sandwich.

    Shrimp Po' Boy with Spicy Mayo Recipe
    Serves 4

    1/2 cup whole wheat flour
    2 cups whole wheat panko breadcrumbs
    3 egg whites
    8 ounces medium shrimp, peeled and deveined
    salt
    1/2 cup lite mayonnaise
    2 tablespoons Tabasco sauce
    4 whole wheat buns
    1/2 bunch romaine lettuce, shredded
    1/2 cup roasted red peppers, sliced
    .
    1.Preheat the oven to 450F. Place a wire rack on a baking sheet and set aside.
    2. Pat the shrimp very dry and season with salt.
    3. Place the flour in a shallow dish. Place the panko in another shallow dish. In a medium bowl, whip the egg whites with a whisk until they are foamy but not quite holding peaks, about 3 minutes.
    4. In small batches, lightly dredge the shrimp in the flour, shaking off any excess. Add the shrimp to the egg whites; toss to coat completely. Then add the shrimp to the panko and turn to coat them completely.
    5. Place the shrimp on the wire rack. Bake until the golden and crispy, about 8 minutes.
    6. Stir the mayonnaise and Tabasco sauce together in a small bowl. Spread 1 tablespoon of the mayonnaise mixture generously on the bun. Top with lettuce and red pepper strips. Pile the shrimp on top of the lettuce and peppers.

    Gonna try it this week! :)